5 easy to grow crops

You want to have your garden but scared you might just screw up everything? Here are some of the crops you can start with that will less likely die even if you do not have the “green thumb”.

1. Kangkong

Do you love adobo and fried kangkong. Growing one is easy. It grows in the water or land. And you can also do hydroponics!

Water spinach or morning glory on white background

2. Alugbati

This one is a no pro thing. Planting one might not require a lot of fertilizer and other maintenance stuff unless they become a little crowded – just do pruning.

IMG_1649

3. Malunggay

You can grow this plant packed with vitamins and minerals anytime during the year through seed or cutting. After 3-4 months you will have free malunggay in your tinola.
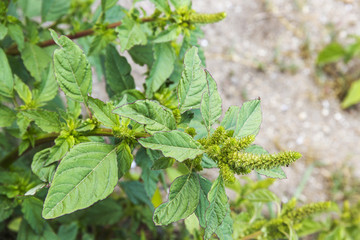
10123

4. Kulitis

Some consider this as a weed and from that you know how effortless you can have this in your garden. Make sure to get those that do not have thorns before cooking your stir fried amaranth.

240_F_171664856_UHC7ZTyaoJfYk0uDCwirmdfOZYRVuFAF

5. Kamote tops

Keep the remaining stalks you got from the market and plant them in your backyard. Two to three weeks you won’t need to go to the market anymore to buy one. And three months after you can have camote cue.

b653ea6ce021102f1ea1720cf0ab6db3

Although these crops are easy to grow, make sure you are committed in your garden and have time to check them from time to time.


Small space for gardening? Do (SNAP) hydroponics!

Have you considered planting vegetables but you don’t have enough space? Conversion of farm lands to residential space is quite alarming since the increasing population will require more food. Learning to farm with limited space is an advantage because you will know how to produce food with your available area (whether small or large).

Hydroponics is a method of growing plants without soil by using nutrient solution in water. Simple Nutrient Addition Program (SNAP) hydroponics is a low-cost hydroponics system developed by researchers from IPB, UPLB. This system is ideal for growing vegetables in small areas.

To do SNAP hydroponics, you need to establish your seedlings. I previously wrote how to do it here. Now that you have your seedlings, you need to prepare styrofoam/plastic cups (or used coffee cups), knife/blade, coir dust, plastic bag, packaging tape and growing boxes (fruit boxes).

Get your cups and create 4-6 (~1-2 inch long) small slits on the sides near the bottom and dig a hole on the center bottom of the cup. Fill the cups with about 1-inch thick coir dust. Carefully transplant one seedling in the cup with coir dust and lightly press the media around the base of the transplanted seedling. Water the cups with care.

Create holes fitted for your cups – you can either trace the cups and cut it with a blade or use heated tin cans.  Depending on the size of your cup, you can create 6-8 holes on the lid. Line the bottom of the box with plastic (make sure that the plastic entirely covers the bottom to hold the solution). (Note: you can close all openings on the box using packaging tape to prevent entry of mosquitoes).

Put the cups into the holes of the lid on the box created earlier. Prepare your SNAP solution by mixing 25mL of SNAP A to 10 liters of tap water and then stir well followed by an equal amount of SNAP B (with stirring).

Fill the bottom of the growing box with the SNAP solution to a level where the bottom of the cups is touching 1/2 inch of the nutrient solution. Close the bottom box with the lid of the box containing the cups with seedling. Examine the box for any leaks and make necessary repair.

Place the growing boxes to areas with roof (to prevent the rain from getting into the system) but will best receive morning sunlight. Closely monitor the set-up.

Replenish the box with SNAP solution whenever needed.

(source: PJA Santos and ETM Ocampo, UPLB)